No one likes an outdated kitchen, and I’m pretty sure NO ONE wants to spend thousands of dollars to have someone come and refinish them. We had very dark red kitchen cabinets when we moved into our home and we lived with them them for 5 years. Then one day when I was 6 months pregnant with our third baby, my nesting kicked up a notch and I decided it was a project we had to take on. After lots of research and practicing on our bathroom cabinets this is How to Paint Kitchen Cabinets the right way!

This Post may contain affiliate links
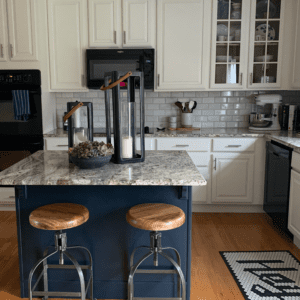
Here is the kitchen BEFORE

I can’t even tell you how many hours I spent researching and watching YouTube Videos on ways to paint your kitchen cabinets. It took weeks to work up the nerve to actually start. After deciding we should practice with our bathroom cabinets first we learned a lot. Here is what we found works best.
Getting a Professional Look
DO NOT CUT CORNERS! There are hundreds of blog posts and videos saying “Use chalk paint and you wont have to sand” or “Use this kit and you don’t have to sand”. Believe me when I say, Not only will you have to sand your cabinets down, you will have to do it at least 6 times. I know you are probably thinking I’m exaggerating, but I’m not. In order to get a professional, smooth finish that won’t chip you HAVE to sand in-between every single coat.
This is what it looks like
Strip Cabinets – Sand Cabinets – Prime – Sand Cabinets – First Coat of Paint – Sand Cabinets – 2nd Coat of Paint – Sand Cabinets – 3rd Coat of Paint – Sand Cabinets – First Coat of Polyurethane – Sand Cabinets – Final Coat of Polyurethane – You are Done.
A sander like the one HERE is a lifesaver for a project like this! Save your hands and your sanity and use an electric sander.

Tips for the Perfect Cabinets
- First Step is to use a strong cleaner like Krud Kutter to clean off that top layer of grease and grime. Then we used a deglosser to strip the cabinets.
- You will want to remove all the cabinet doors so you can lay them flat when you start applying layers of paint. Make sure to label your cabinet doors so you know where they belong when you go to put them back. I also labeled them with an arrow pointing to which end was the top so there was no confusion.
- When we first started painting we were doing it in the garage but we quickly learned that the Summer heat and dry Colorado air was making the paint dry faster then we could apply the full layer. This was giving an uneven finish that didn’t look the best. We ended up moving everything down to our basement. The cooler environment did wonders for the finish of each layer of paint.
- Use a heavy duty primer. When we started with the bathroom cabinets I made the mistake of using a water based primer. This is not the project for a water based primer. If you want durable cabinets that can withstand wear then you need to use an oil based primer. We made the switch to oil based when we started the kitchen cabinets. It was a great starting layer that easily hid our dark red cabinets underneath. *Since I was pregnant this was a step that Rex did all on his own. We opened all windows and doors and the kids and I would leave the house for a few hours while he applied the oil based primer due to the fumes.
- Another Game Changing Tip is using Floetrol in your paint. This thins the paint out so it will lay and dry evenly on your cabinets. This makes a huge difference. Don’t skip this step.
- A dense foam roller like this one HERE ended up being the best way to apply each layer. It gave us a much smoother finish. We tried using a brush and you could see brush strokes. Even a paint sprayer ended up giving us a splattered mess. TIP: Remember to finish your roller stroke in the same direction each time.
- These paint pyramids HERE were a life saver too. We would lay the cabinets on these so they could dry without ruining the other side of the cabinet.

Final Thoughts on Painting your Kitchen Cabinets
At the end of the day, whenever people ask us if it was worth all the effort we say “Absolutely, yes!” But don’t be fooled. It is a lot of work and not a home project you can rush through. It took us an entire month to finish our kitchen cabinets. Be patient.
Although it is a lot of hard work, it cost us a few hundred dollars in materials vs. thousands of dollars we were quoted to have someone else do it. Its a time consuming project, but extremely easy and doable if you are patient. For us, it wasn’t worth spending 10 times more to have someone do something we could do ourselves. If I can do it 6 months pregnant and with 2 toddlers running around, then you can do it too.
Update: The Kitchen Cabinets have held up fantastic. It’s been 2 years since we painted them and we still don’t have any chips or marks.
If you love this post on How to Paint Your Kitchen Cabinets, check out my other DIY Home Projects like How to Paint Linoleum Floors and How to Tile a Floor Like a Pro.
For more inspiration, ideas and sneak peek into our daily life, head over to Instagram and give me a follow.